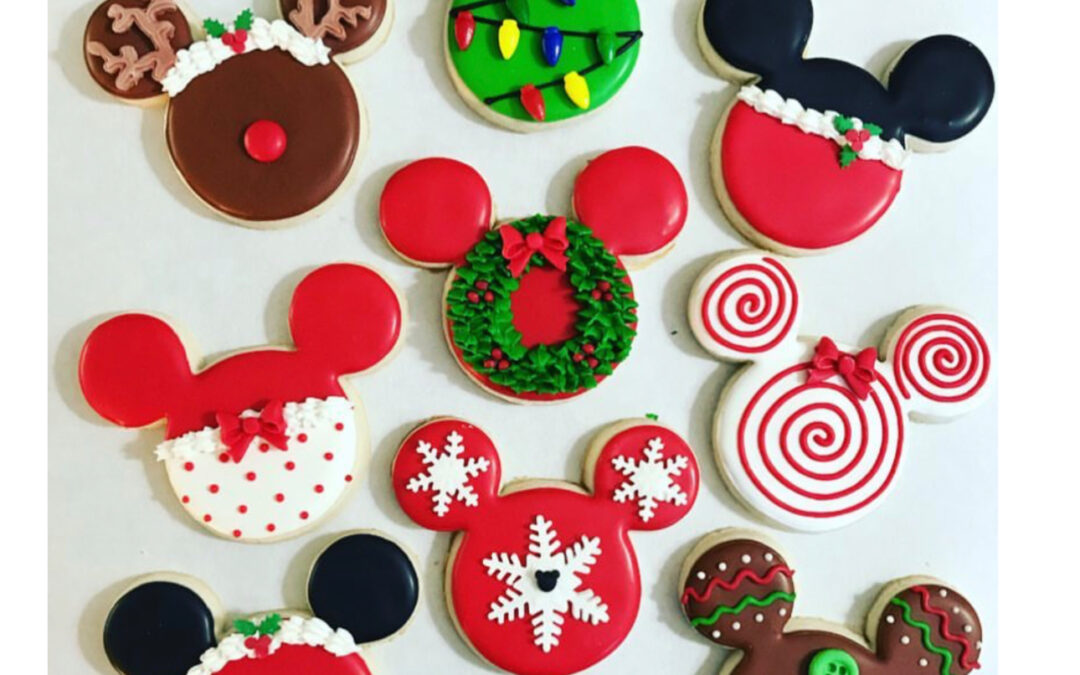
There’s nothing like the magic of holiday cookies to bring joy to your kitchen this season. Whether you’re hosting a festive gathering or crafting treats for loved ones, decorating cookies is a fun and creative activity for bakers of all ages. This year, we’re sharing a step-by-step guide to creating beautiful and whimsical holiday cookies inspired by a timeless favorite: Mickey Mouse!
What You’ll Need
Before we dive into decorating, let’s gather the essentials:
Cookie Cutters: A Mickey Mouse cookie cutter and holiday-themed shapes like snowflakes and stars.
Royal Icing: Red, green, white, and black icing for classic holiday colors.
Sprinkles: Holiday-themed sprinkles for accents and extra cheer.
Edible Markers: Metallic or classic markers for adding fine details.
Piping Bags and Tips: A fine-tipped piping bag for precision work.
Gel Coloring: Concentrated colors to make the royal icing all of the colors you need.
Step 1: Prepare Your Cookies
Start by baking your favorite sugar or gingerbread cookie recipe. Roll out the dough evenly to ensure consistent shapes, and use your Mickey Mouse and holiday cookie cutters to create the perfect silhouettes. Bake and cool the cookies completely before moving on to decorating.
Step 2: Base Layer of Icing
Begin with a smooth base layer of royal icing. Use a piping bag to outline the cookie, then flood the center with icing. For Mickey-inspired cookies, use black icing for the ears and a vibrant red for the lower half. Let the base icing dry for a few hours before adding more details.
Step 3: Add Holiday Details
Here’s where the magic happens! Use white icing to create a Santa hat on Mickey’s ears or add snowflake patterns. Green icing works beautifully for holly accents or wreath designs. Sprinkle holiday-themed sprinkles while the icing is still wet for added texture and sparkle.
Step 4: Fine Details
Once the base layers are dry, use edible markers to draw small details like buttons, snowflake patterns, or even Mickey’s signature smile. Metallic markers can add a touch of holiday shimmer.
Step 5: Finish with Flair
For the finishing touches, dust the cookies with edible glitter or sprinkle powdered sugar around the edges for a frosted effect. Arrange your cookies on a festive platter and admire your holiday masterpiece!
Why Decorate with Sweet Life Supplies?
At Sweet Life Cake and Candy Supply, we stock everything you need to make your holiday baking magical. From cookie cutters to sprinkles and edible markers, our products are designed to help bakers of all skill levels create stunning treats. Visit our Miami store or shop online to explore our full range of baking supplies.
Final Thoughts
Decorating holiday cookies is more than just a baking project – it’s a chance to spread joy and make memories with loved ones. With this step-by-step guide and a dash of creativity, your Mickey-inspired holiday cookies are sure to be the star of any celebration.
Share Your Creations: We’d love to see your decorated cookies! Tag us on Instagram or Facebook with your holiday baking projects and inspire other bakers in our Sweet Life community.

